What is bumblefoot in chickens?
Bumblefoot in chickens is an infection, almost always on the bottom of a chicken’s foot. The infection is caused by bacteria that gets into a small cut, scratch, or other little injury on the foot.
I have found that bumblefoot in my chickens is more common when it’s been wet and humid. I’m guessing that’s because those conditions are just perfect for bacteria to grow and multiply!
Basically, our chickens are walking around barefoot all the time. Any small thing, even stepping on a feather wrong, can cut their feet. When it’s super wet and humid out and the ground doesn’t dry for days on end, the soles of their feet remain softer and get cut up a bit easier.
What does it look like?
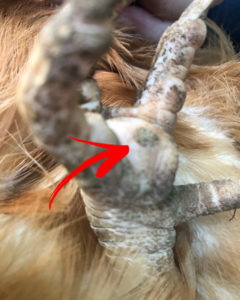
If bumblefoot is caught early enough, it will just be a small-ish black spot on the bottom of the chicken’s foot. It can get much, much worse. A quick image search for “bumblefoot” will show you just how bad it can get.
You will most likely not notice that a chicken has bumblefoot until it starts limping a little or obviously favoring one leg over the other when doing things. It is sometimes impossible to check every chicken’s feet every week or so, especially if you have a lot of chickens, so paying attention to how each is walking really helps!
How to treat bumblefoot.
Thankfully, treating bumblefoot in chickens is not all that difficult as long as you catch it early! Early treatment is so very important!
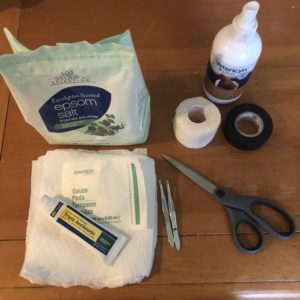
What You’ll Need
Large bin – that will comfortably fit the chicken and about an inch of water
Epsom Salt
Vetericyn Plus – antimicrobial poultry care (Vetericyn website, not affiliate link)
Bacitracin – or Neosporin, just be sure it’s the non-medicated kind, so no extra pain stuff
Athletic self-adhesive tape
Electrical tape
Gauze
Scissors
Tweezers and/or razor blade
Gloves to protect yourself
Paper towels and an actual towel are recommended as well
Steps to Take for Treatment of Bumblefoot in Chickens
- Fill the bin with about 1 to 2 inches of warm water and add some epsom salt. Let the salt dissolve into the water while you go find your chicken (if you don’t already have the chicken somewhere easily accessible).
- Set the chicken in the bin so her foot can soak for 15 to 20 minutes. She may want to get out.. offering treats or putting a towel over the bin (with space open so she can breathe) will help a lot.
- Wrap her up in a towel so her wings are comfortably at her side, but she can’t really move and find the foot!
- Using tweezers (or a razor blade), go around the edge of the black spot on her foot. The idea here is to loosen the black “plug” around all edges. If this is difficult, she may need to soak longer. Once loosened around the edges, the black plug should come right out.
- Make sure no dead skin or puss is in the wound. You may have to squeeze some puss out and pick out a little more black-ish looking skin prior to cleaning and bandaging the wound.
- Once fully clear of gunk, puss, and dead skin, spray the foot with Vetericyn Plus Antimicrobial Poultry Care (or something similar) and let it air dry. While the infected area of the foot is air drying, clean around the wound and between the toes and things. This will help ensure the bandages go onto a fully clean foot:)
- Once air drying is complete, put bacitracin (Neosporin) without extra pain relief added onto the wound.
- Put a small piece of gauze overtop of that.
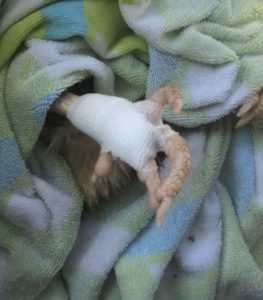
- Wrap the foot (around the ankle, between the toes) with the athletic tape. You want it to be tight enough to hold, but not so tight that she can’t move her toes. If the toes start to feel cold… too tight!
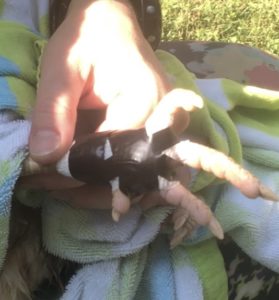
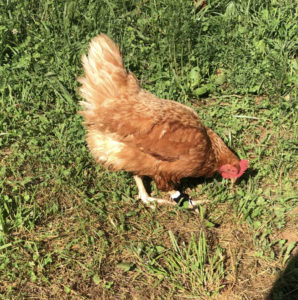
- Finish up by covering most of the athletic tape with electrical tape. Again, don’t wrap too tightly. This will help keep the athletic tape somewhat moisture proof and therefore help keep the wound cleaner.
Check on the wound every day or two and rewrap as needed.
